Keys on my Kawai E-Piano are sticky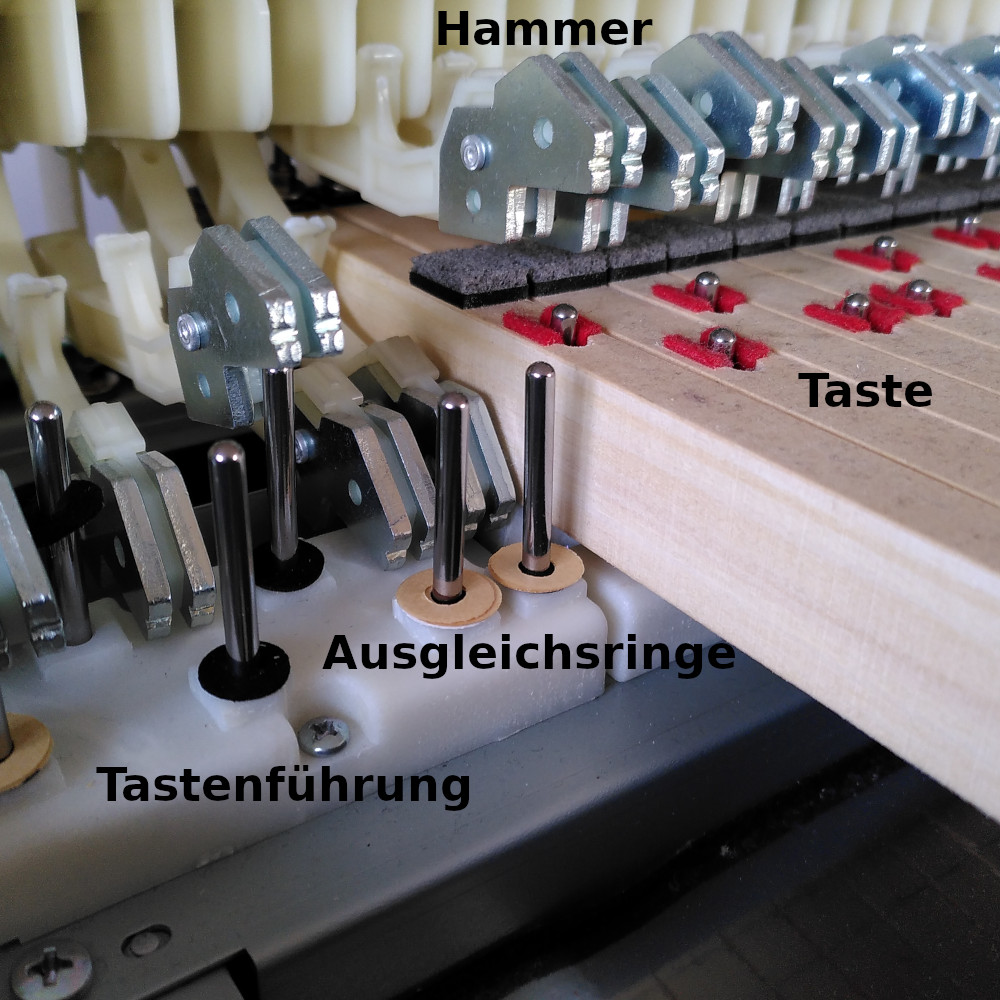
With a Kawai electric piano, such as a Kawai CA65, it can happen that the keys become sluggish. It can also feel like the keys are sticking. After a long break from playing, the key is really stuck. Once you have overcome this resistance of the key then the key goes again quite smoothly and without problems. Until the next gaming break.
Why are the keys sticky on my Kawai E-Piano
Kawai builds in various electric piano series keyboards in which the keys are made entirely of wood. In contrast to the usually used plastic keys, these wooden keys are very long and at the end of the key a so-called hammer works as a counterweight. The length of the wooden keys is similar to that of a classic mechanical piano or grand piano, which results in an equivalent leverage ratio. This makes the feel with these wooden keyboards from Kawai very similar to the feel of a grand piano.
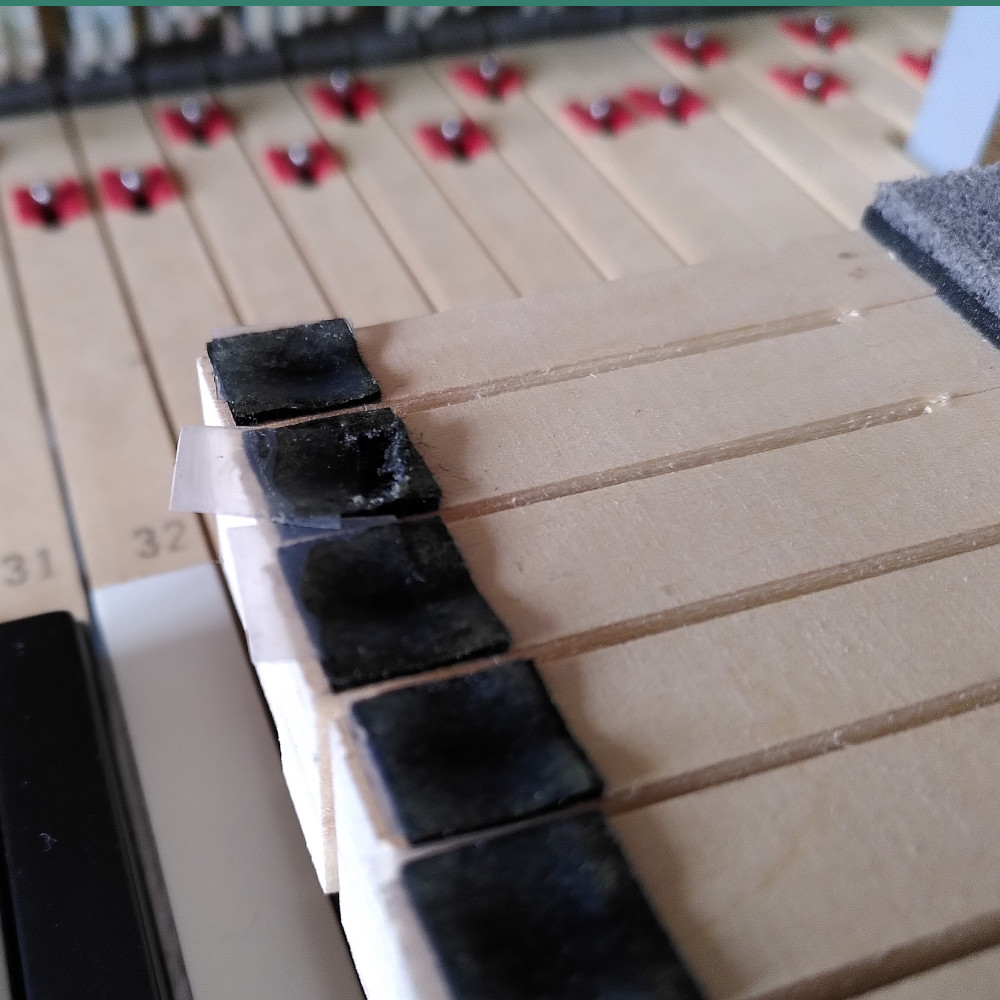
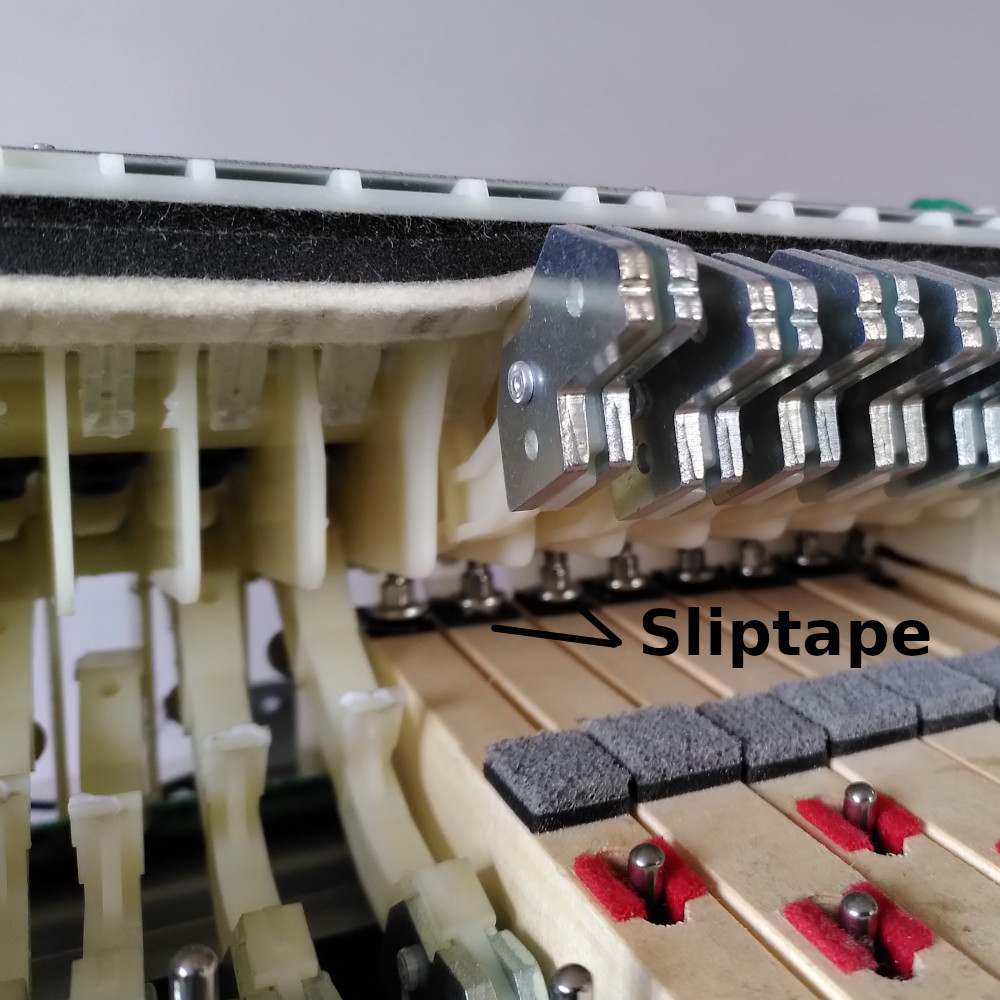
The wooden keys in a Kawai electric piano have a hammer at the rear end, a counterweight. This counterweight ensures that a certain force must be applied when playing the keys. At the same time, the hammer actuates the contact rubber which generates the electrical signal for the sound. Between hammer and key Kawai has glued a small rubber pad (sliptape) on the wooden key. This rubber pad reduces mechanical noise and provides better gliding properties of the hammer on the key. This rubber pad is called sliptape and consists of at least two different materials. Over the years of use of the electric piano, these different layers of sliptape begin to shift. When this process is well advanced, the hammer no longer sits on the upper sliding layer but on the adhesive layer that bonds the different materials together. The hammer sticks to the key. Ambient heat has an influence on this sliding process of the sliptape. Electric pianos that stand in the sun have a problem with sticking keys more quickly than electric pianos that always stand in the shade.
Solution
The sliptape can of course be replaced. However, this is a time-consuming process and should always be done for the entire keyboard. We as a specialist workshop need 4 to 5 working hours for this with the appropriate practice and experience.
How do I proceed if I want to replace the sliptape?
First of all, a decision has to be made. Do I want to keep the sliptape and just renew it or do I want to replace the sliptape with special piano felts. The amount of work for both options is about the same. The advantage of the piano felt is that I can obtain it from various manufacturers or piano builders. With the sliptape I am always bound to Kawai. Many piano builders I have talked to about this subject recommend the use of piano felt because it has been used in piano building for decades/centuries and is designed exactly for this application. The longevity is proven. With Kawai, the longevity of the sliptape depends on the current material composition.
What tools and materials are needed:
- Sliptpape or
- Klavierfilz
- Sliptape or spezial piano felt
- Cutter knife
- Alcohol - Isopropanol
- Polishing cloth, cleaning cloth (fabric - e.g. old T-shirt)
- Ponal wood glue - if you work with a piano felt
Practical part: replacing Sliptape on Kawai wooden keys:
First of all, the housing of the electric piano must be opened to access the keyboard. Pay attention to possible loudspeakers and loudspeaker cables that may be mounted in the lid of the piano (depending on the model) The keyboard itself can remain in the electric piano. It does not
have to be removed. Now the keys can be taken out of the keyboard one by one. The keys should be lifted as straight as possible until they are above the key guides.When removing the keys, always look at the underside to see if a compensating ring has become stuck on the key. If this is the case, put the compensating ring back on the corresponding key guide. The old sliptape can now be cut off with a cutter knife. The knife is applied as horizontally as possible to the sliptape. If some wood of the key is cut off, this is not so tragic. If necessary, this can be compensated later on the hammer. The new sliptape is coated on one side with eienr adhesive film and can now be easily glued on. When using the piano felt, glue the felt with Ponal. In both cases, cut the strip perpendicular to the keys only after the sliptape has been glued on. Always cut from the top.
Very important: Cleaning Kawai Hammer Pilot
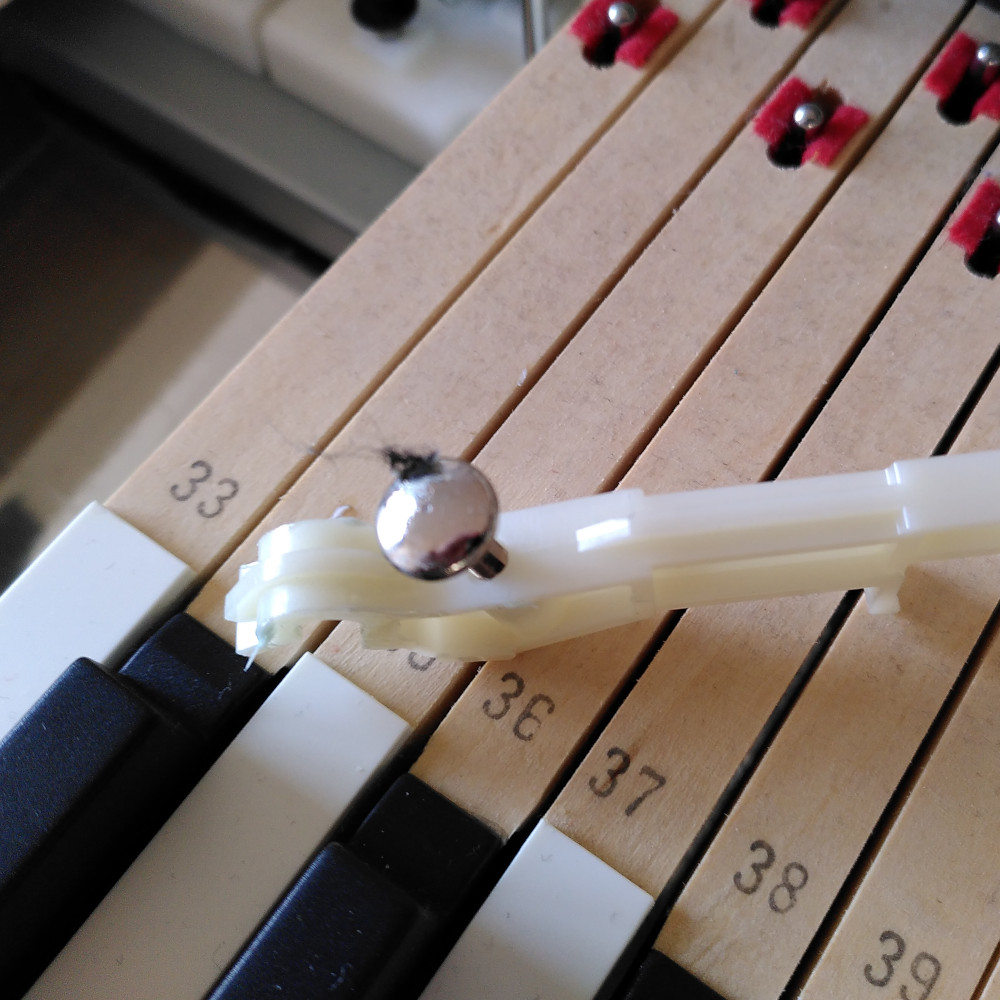
Before reinserting the key, always remove the hammer from the keyboard and clean the hammer head (pilot) and remove any adhesive residue. In most cases, the hammer head is contaminated with glue or keyboard grease. In light cases, cleaning with alcohol is sufficient; in the case of adhesive residue, it is very useful to polish the pilot. Glue is very stubborn and alcohol is not sufficient as a cleaning agent in most cases. At the end of this step, the hammer head must shine and not look dull or greasy.
Reinstall Kawai Hammer in Keyboard: The hammer can only be reinserted in a very specific position. The hammer holder is flattened at a specific position. If the hammer has been inserted correctly, the hammer sits firmly in the upper stop position and cannot fall out. After this, reinstall Kawai wooden keys.
Summary
I personally find the wooden keyboards from Kawai very beautiful and pleasant to play. Since I am not aware of any other provider of electric pianos that offer this design of the keyboard, Kawai has a unique selling proposition here. The electric pianos from Kawai are basically very durable construction. The sliptape is a small weak point here. The replacement of the sliptape with special piano felts is certainly a more durable solution than the sliptapes.
Newer Kawai E-Pianos where build without Sliptape Finally, it should also be noted that in newer electric piano models from Kawai is completely dispensed with the sliptape. The whole key structure was changed by Kawai something so that no more sliptape is needed. The exact time of this change is unfortunately not known to me.
This article was written in January 2022.

